Our guides cover most inquiries.
Equipment
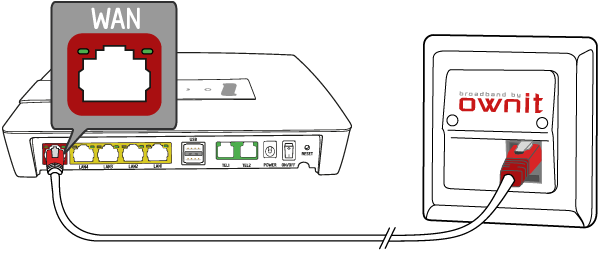
1. Connect the internet cable
Start by connecting an internet cable between the broadband plug and the WAN port on your router.
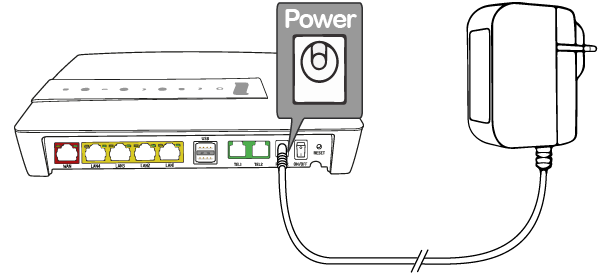
2. Connect the power
Then, plug in the power cable.
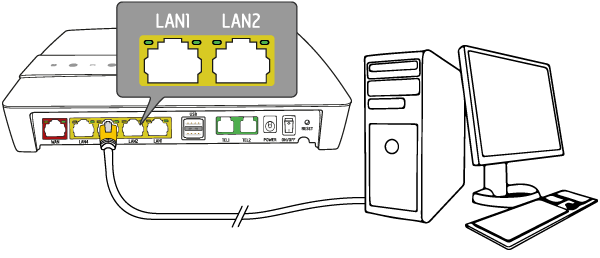
3. Connect your computer
Now you can connect your computer to LAN 1 or LAN 2. You can also connect wirelessly, please see step 6.
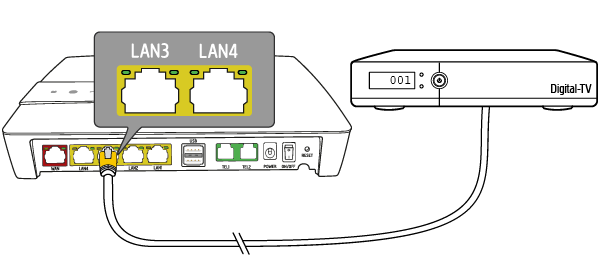
4. Connect your TV box
If you have IPTV through us then you will need to connect your TV box to the router as well. Make sure that the internet cable is connected to LAN 3 or LAN 4. If you don't have our IPTV service, you can skip this step.
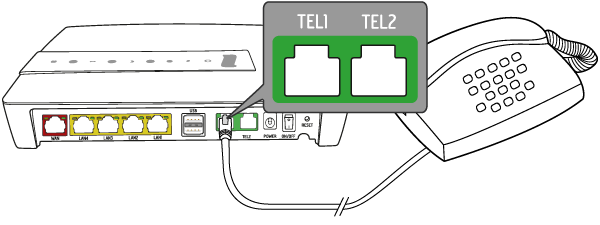
5. Connect your landline phone
If you have our telephony service, you will need to connect your phones base unit to the green TEL1 port in the router.
If you don't have our telephony, you can skip this step.
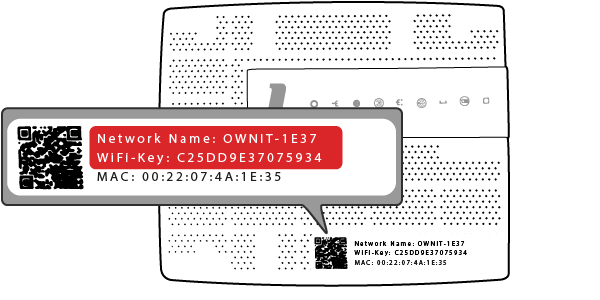
6. Connecting wirelessly
Your WiFi information will be on the bottom of the router and on a sticker on the front.
SSID = your networks name
Wireles Key = the password
You can change your network name and password by logging in to My Pages.
Note that the 5GHz network will more often give you a faster WiFi connection with a slightly smaller range. If your devices hade 5GHz support then we strongly recommend using this network.
To find out more about WiFi, check our WiFi guide!

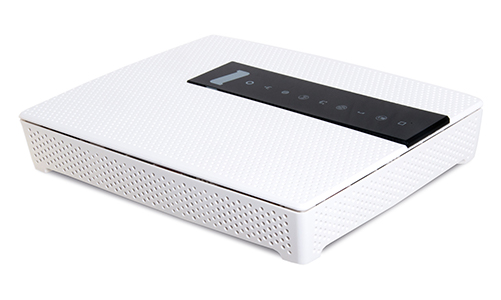
EG300 - Front
1. Status
Green = Power is on
Red = Startup issues
2. Broadband (WAN)
Green = connection to the broadband plug / incoming fibre connection
Off = no connection (no link)
3. Internet
Green = connected to the internet (has an IP address)
Red = connection failed (has no IP address)
4. Wireless (WiFi)
Green = wireless 2,4GHz connection
Blue = wireless 5GHz connection
5. Ethernet (LAN1-LAN4)
Green = cable connected
Off = no cable connected
6. WPS
Hold your thumb to the light for 5 seconds to start WPS pairing
Green (blinking) = WPS pairing ongoing
7. TEL1 / TEL2
Green = telephone connected and ready
Green (blinking) = call ongoing
Off = no telephone connected
